Author: Piyush Lokhande(Senior DevOps Engineer)
Key Interview Inquiry :
Q: “There is one application we want to deploy on AWS. Could you explain the steps on how to do that briefly?”
Docker is a platform designed to make it easier to create, deploy, and run applications using containers. Containers allow a developer to package up an application with all the parts it needs, such as libraries and other dependencies, and ship it all out as one package.
Step 1: First create an Ec2 instance with a configuration with as per your organization’s requirement (AMI, SG, Key, VPC, Volume, etc)
Step2: Finally create your instance.

Step 3: Connect your instance with the cmd/putty terminal.

successfully connected with cmd.
Step 4: Run the below commands on below terminal for installation of the docker.
sudo yum update -y
sudo yum install docker -y
sudo service docker start
sudo usermod -aG docker <username>
docker - version
Step 5: Finally docker install on your machine with version 24.0.5 .

Step 6: Next open the Elastic Container Registry (ECR) service on AWS .
Step 7: Pull a Specific image of docker on the terminal with commands.
docker pull <image name> (eg. redmine)

Step 8: After pulling the image check whether it pulls or not with the below commands.
docker images
Steps9: Finally you get the image below as.

Step 10: Same as above You can create an image by writing a docker file from that docker file we can create an image also with the below commands.
docker build -t < name of the image>. ( #Not fixed name you can give any)
docker images (# you get images above as)
Step 7: Create a Repository on the Elastic container registry (ECR) which is name shown below as.
. Click on the Create a Registry icon.
Step 8: After clicking on Create Registry you get the page below as.
. Add the repo name to the below box.
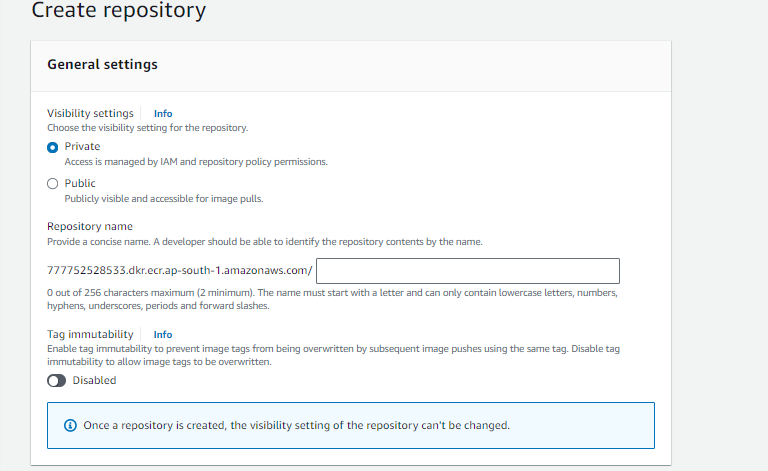
Step 9: You get the repository below as.

Step 8: After creating a repository our repo is empty.

Step 9: This is the only empty repo we want to push our terminal image on the above repository for that we want to follow the below commands.
yum install -y aws-cli ( #First, install aws-cli on your terminal)
aws - version

step 10: Finally, install aws-cli on the terminal.
Step 11: Run the below commands to interact with the ECR service with your terminal.
aws ecr get-login-password - region ap-south-1 | docker login - username AWS - password-stdin <aws_account number>.dkr.ecr.ap-south-1.amazonaws.com
Step 12: To tag your image run the command.
docker tag redmine:latest <aws_account number>.dkr.ecr.ap-south-1.amazonaws.com/redmine:latest
Step 13: Finally for the push image on ECR run the below command.
docker push <aws_account number>.dkr.ecr.ap-south- 1.amazonaws.com/redmine:latest

Step 14: Finally push your image to the Elastic container registry (ECR).
Step 15: If you push successfully you get the page below as.

Step 16: Finally your image is stored in the Elastic container registry (ECR).
Step 17: After creation of image containerize by using Elastic Container Service(ECS).
Step 18: Open Elastic Container Service(ECS) first create one Cluster.
- Inside the creation of a cluster, there are three options where you want to deploy your image select as per your requirement.
- AWS Fargate (serverless) Pay as you go. Use if you have tiny, batch, or burst workloads or for zero maintenance overhead. The cluster has Fargate and Fargate Spot capacity providers by default.
2. Amazon EC2 instances Manual configurations. Use for large workloads with consistent resource demands.
3. External instances using ECS Anywhere Manual configurations. Use to add data center computing.
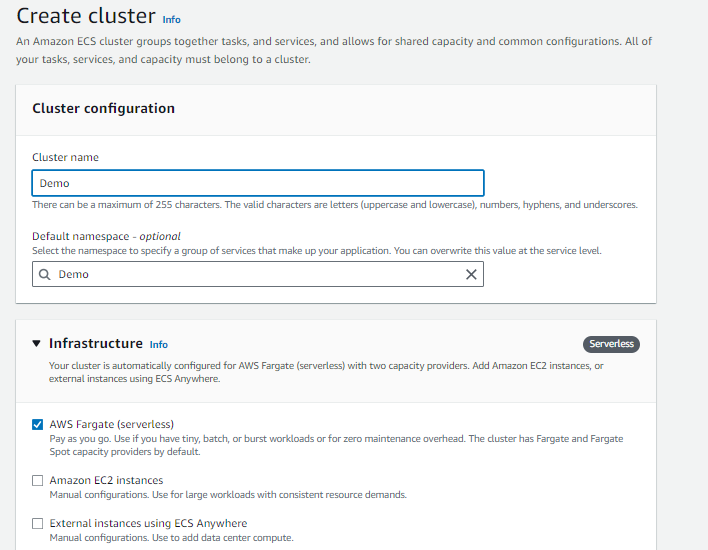
AWS Farget (serverless)
Step 19: Finally your cluster is created.

Step 20: Create a task definition for your cluster below as.
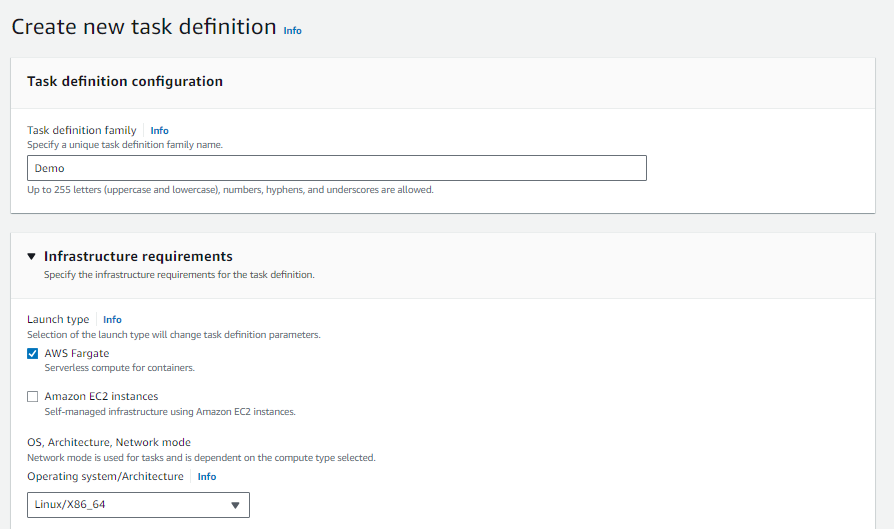
Step 21: In the container section add your repository URL from ECR below as.

Step 22: Copy the above as an image URL and add it to the container section which is in the creation of the task definition.
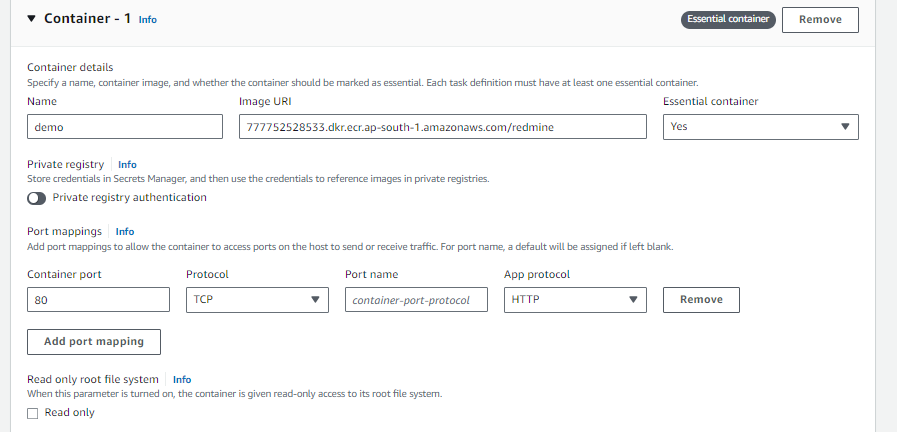
Step 23: Select other configurations also as per your requirement.
Step 24: Finally create the task definition.

Step 25: Go inside the cluster that you have created. you get the service section below as.
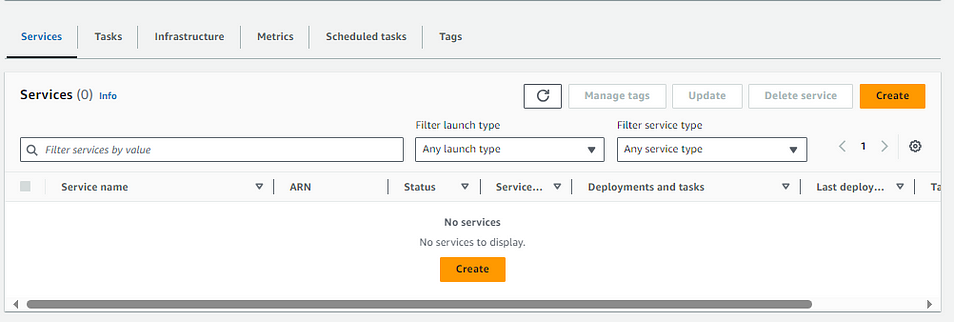
Step 26: Click on Create a service for your cluster.
Step 27: To create the service you get the page below as.
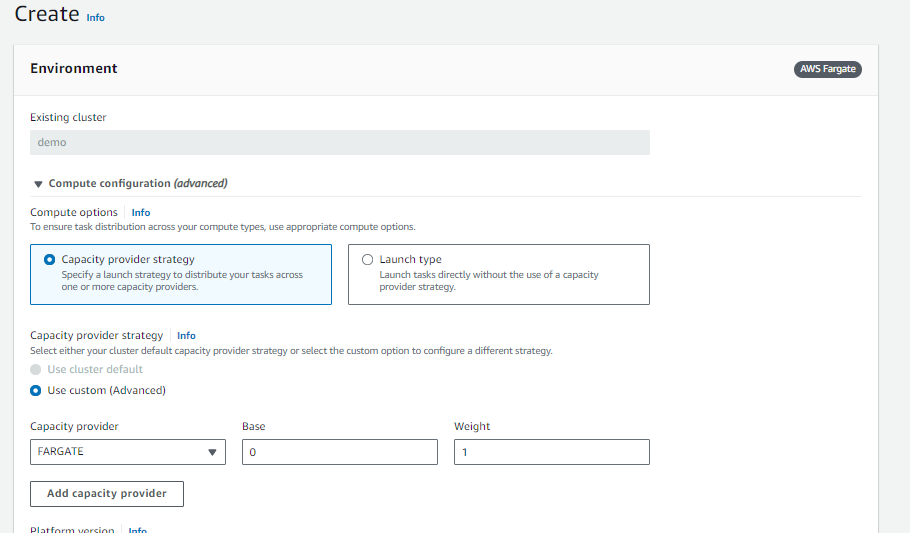
Step 28: After the above page you get the page below as the attached task definition which you have created in the < family> section.
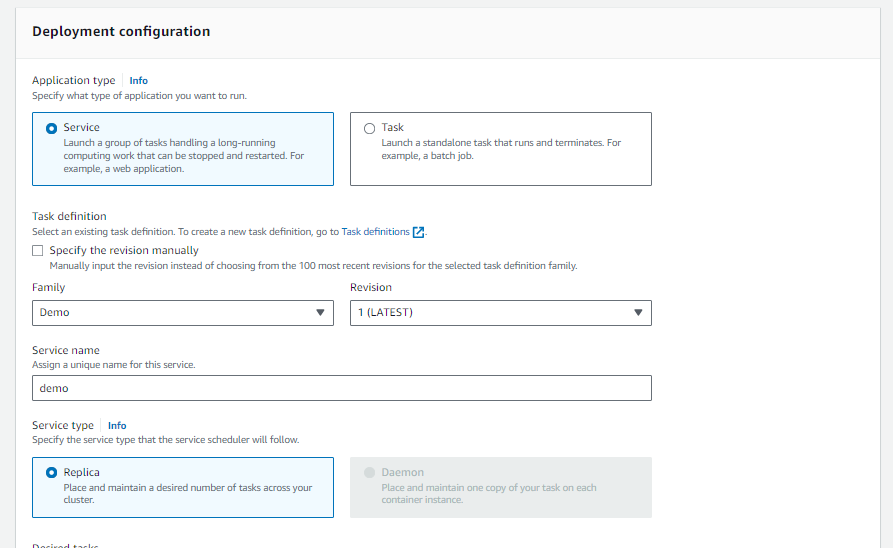
Step 29: Add other configurations also as per requirement.
Step 30: Finally create a service on a cluster you get the status below as.

Select the Service section
Step 31: Finally your image deploys successfully To test whether your image deployed or not go to the Task section you get the page below.

Select the Tasks section
Step 32: Congratulate our image deployment successfully on the ECS cluster.
Step 32: If you want to check with the IP. address open that above task you get public IP below as.
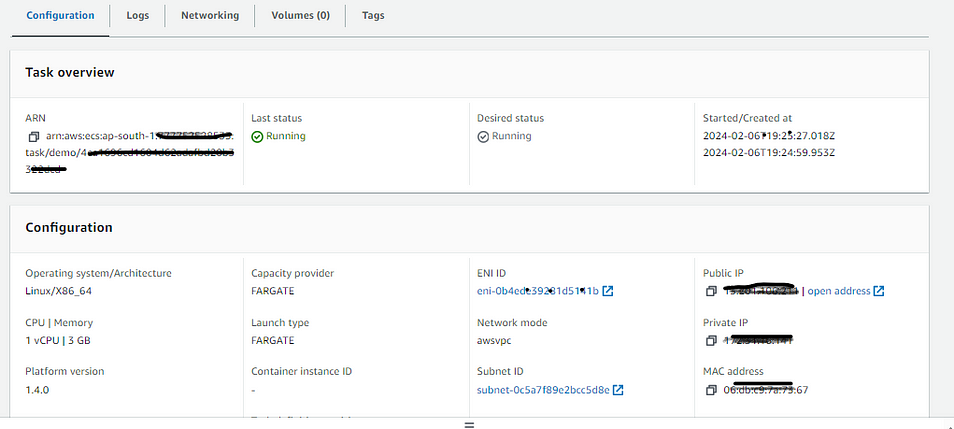
Select the configuration section.
Step 33: Insert that public IP on the web with the port of the container that we have given you get the page below as.
<public ip>:3000
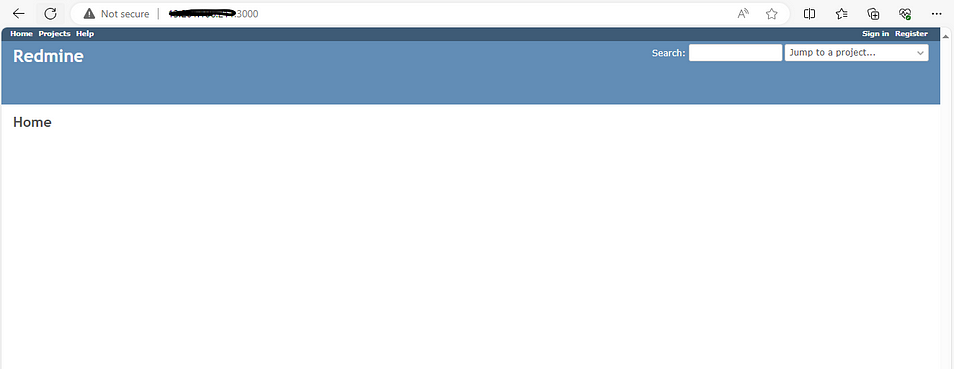
With port:3000

