

Setting Up PuTTY for Seamless Connectivity with Your EC2 Instance: A Step-by-Step Configuration Guide
Author: Piyush Lokhande(Senior DevOps Engineer)


What Is Putty?
PuTTY is a free, open-source tool used for connecting to remote servers securely. It’s commonly used on Windows to establish SSH, Telnet, or other network connections for managing servers or cloud instances. puTTy making it popular among system administrators and developers for command-line access to remote systems.
How To Install Putty?
website: https://www.chiark.greenend.org.uk/~sgtatham/putty/latest.html
How To Use Putty?
Step 1: open the above link and install the successfully putty on your local machine/window.
Step 2: After installing you get the page below as.
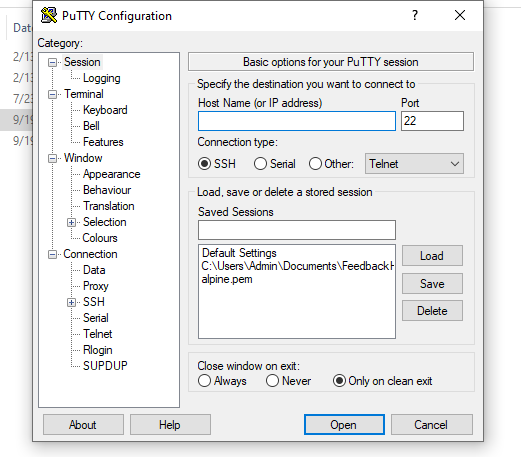
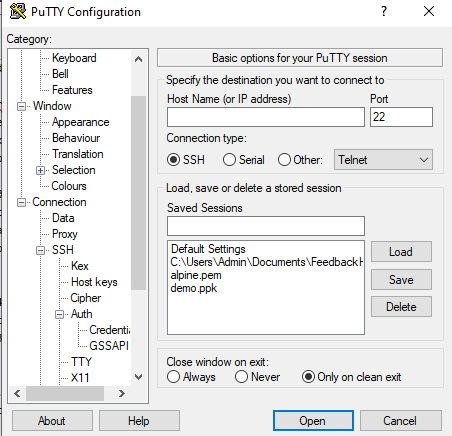
Step 3: After that follow the given steps for configuration.
In the Host Name (or IP address) section add the Ip address of your ec2- instance.
. For Amazon images used ( ##ec2-user@Ip.address)
. For Ubuntu image used (##ubuntu@Ip.address)
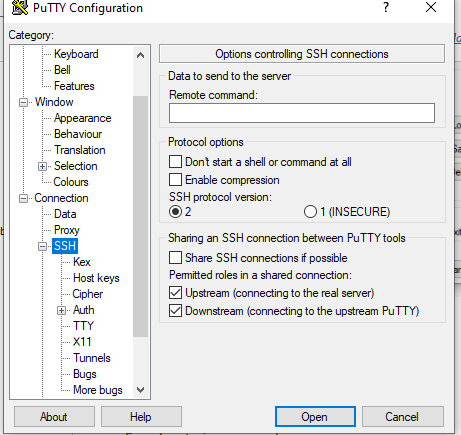
Step 4: Click on the left-side icon. + SSH (#click on only plus icon)
Step 5: After hitting on the plus icon you get the page as below.
Step 6: After that click on the plus icon + Auth you get the page below as.
Step 7: Then click on Credential which is available in the Auth section you get the page as below.
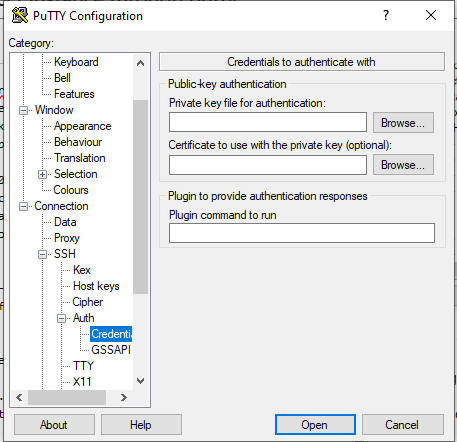
Step 8: On the above page Select the section right column which is on the private key file for authentication.
Step 9: Click on the Browse… icon.
Step 10: Select your instance PPK file/key which you have attached to your ec2-instance. After the attached key Click on the open icon at the end.
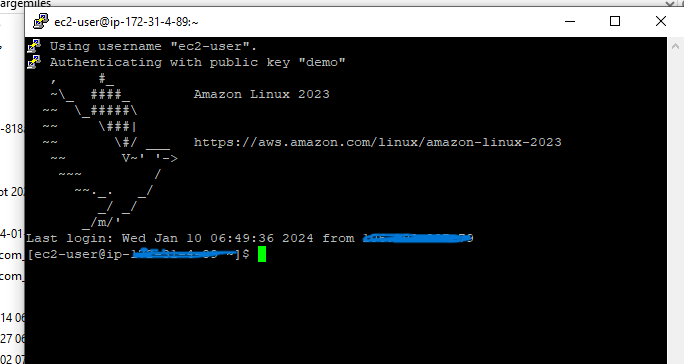
Congratulations Finally you get the terminal of the ec2 instance through Putty as given below.